File Uploads
There are various forms within OptiPub that utilize file uploads through the browser.
Examples
Listed below are the file upload fields found in OptiPub.
Module | Form | Field | File Type |
|---|---|---|---|
Administration | Customization Options | Custom Logo Image | Image |
Content | Authors | Newsletter Image/Website Image | Image/Image |
Content | Resources | Thumbnail Image/PDF | Image/PDF |
Content | Videos | Thumbnail Image | Image |
Messaging | Create Message | Content¹ | Image |
¹ Content fields in the Messaging Module are handled by our TinyMCE plugin.
Instructions
- Click the corresponding Upload button to begin the upload process.
a. Within our OptiPub forms, this button will say Choose.

OptiPub Uploads
TinyMCE
b. Within TinyMCE, it will be the image icon in the icon toolbar

TinyMCE Uploads
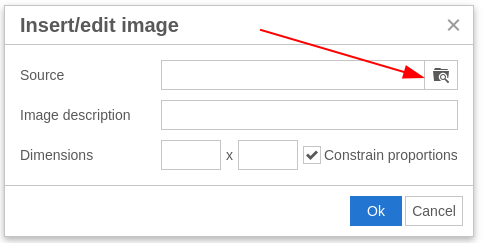
After selecting the image icon in the toolbar, you will be prompted with another dialog. Select the file browser icon to begin the upload process. When using the TinyMCE file uploader, you will be allowed to set an image description and image dimensions after an image has been chosen.

Select the file browser icon
- Choose existing asset or upload new.
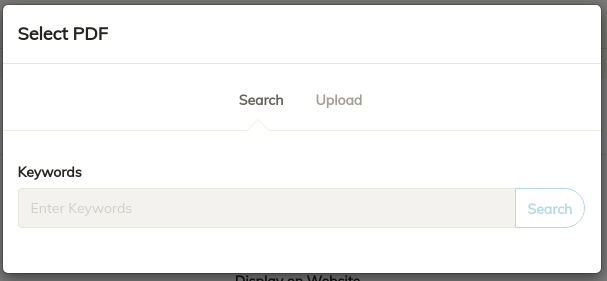
In both OptiPub and TinyMCE file uploads, you will be prompted with a new dialog with two tabs: Search and Upload. The Search tab allows you to search using keywords for an existing asset. The Upload tab will allow you to upload a new asset and define the search keywords.

Sample PDF upload dialog
a. Search for existing asset.
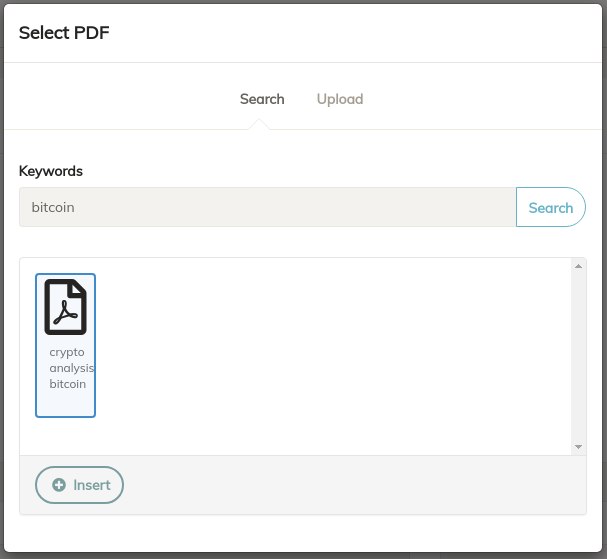
You have the ability to search for an existing asset before having to upload a new file. To search, enter keywords into the text field and then click Search. If there are no matching files that match your keywords, try searching using different keywords, or continue on to the Upload instructions. If there are results that match your keywords, then a box will appear below the keywords fields with a list of matching files. If you wish to use one of the matching files for your file upload, simply click on the file icon, and then select Insert. The dialog will close and that file will be chosen for your current field. If within TinyMCE, you will be given the opportunity to define the image dimensions and descriptions. If you do not wish to use any of the assets returned from the file search, please continue on to the Upload tab.

Searching and selecting an existing PDF by keywords
b. Upload a new asset
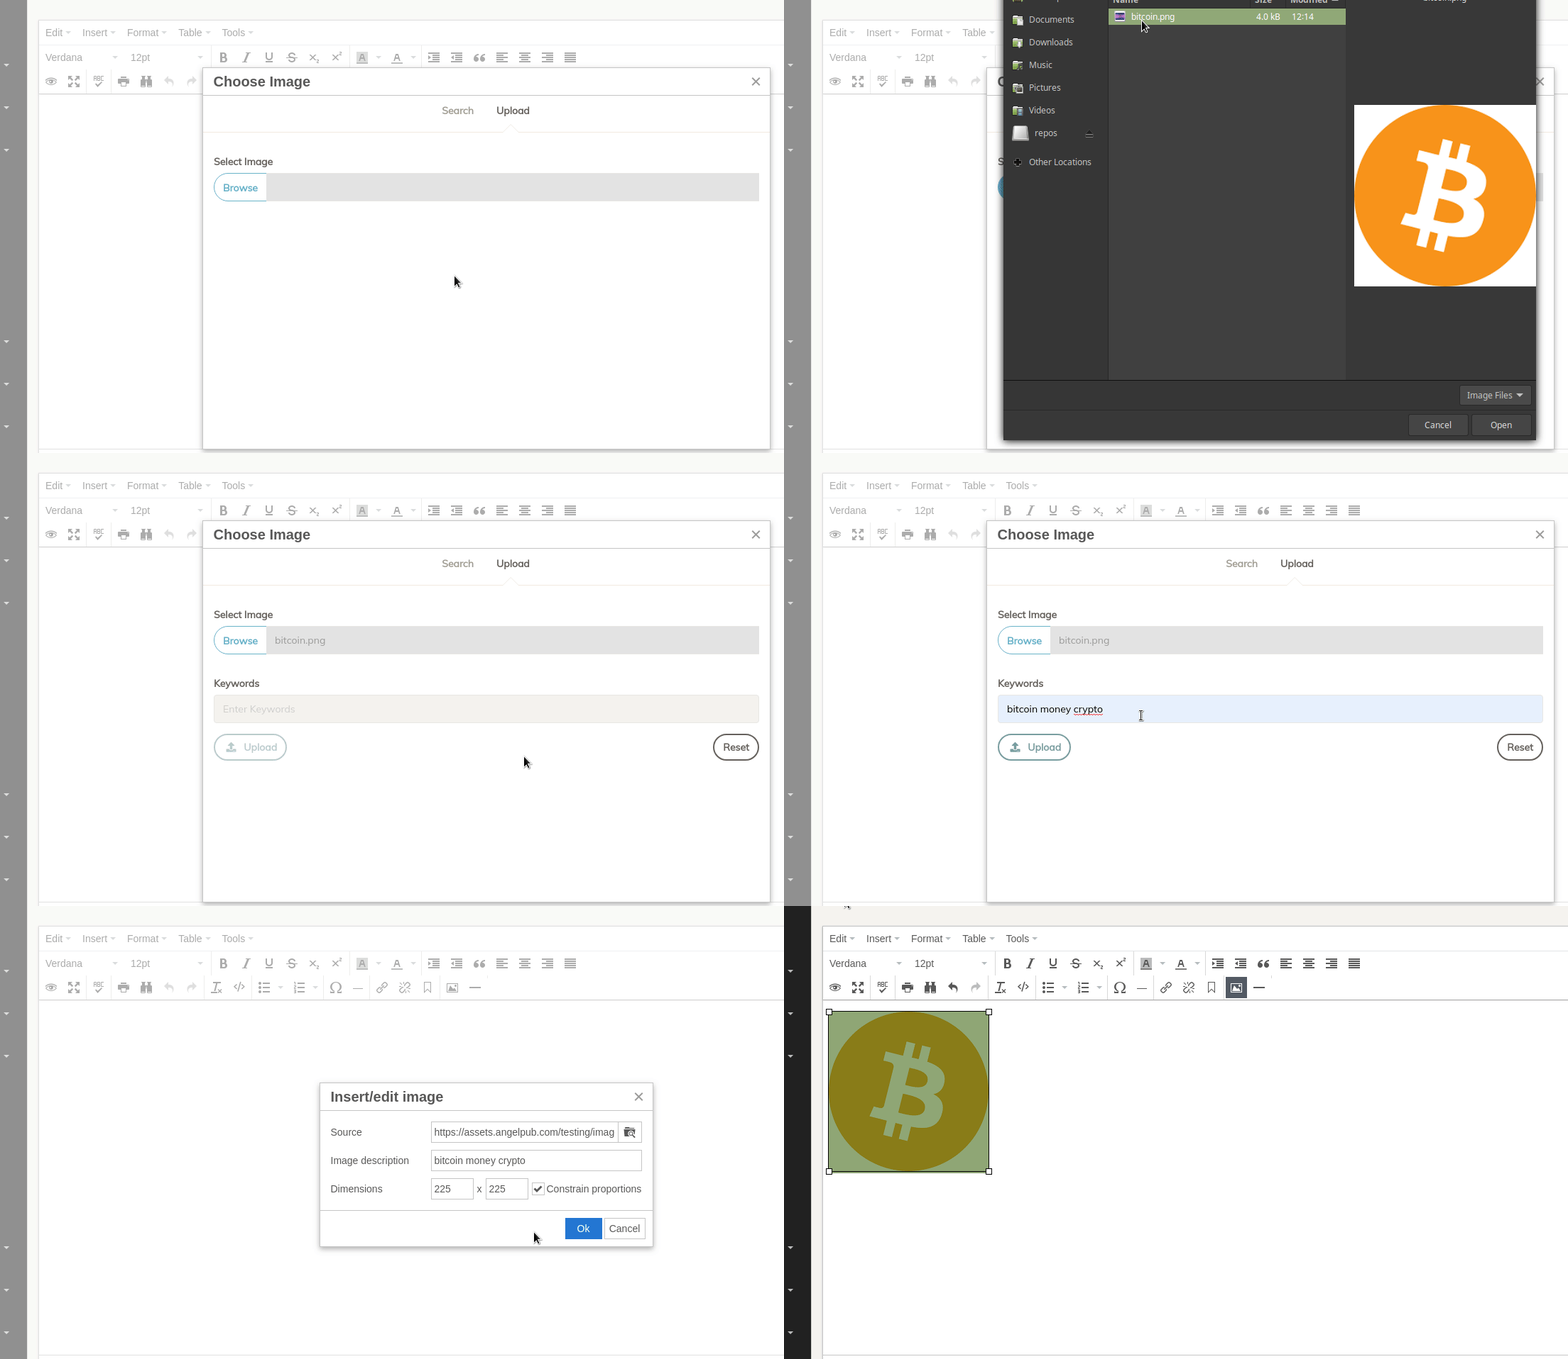
In order to begin uploading a new file, select the Upload tab of the file upload dialog. From there, click the Browse button which will open a file browser on your local computer. Browse your computer and select the file you wish to upload. Note that only allowed upload file types will be shown. After selecting your file, click Open to choose that file and continue. Now, you must enter at least one search keyword for the file in order for the file to be uploaded. This will allow the file to be found for later use using the Search tab. After typing in a few search keywords, press the Upload button to begin the file upload. If successful, the dialog will automatically close and set your uploaded file in the current field or TinyMCE editor. If an invalid file is detected, or if the file is too large, you will see an error message. Please try again or choose a different file. Please refer to our asset validation rules below.

Uploading new asset to TinyMCE
Asset Type | Allowed File Types | Maximum Size |
|---|---|---|
Image | jpeg, png, bmp, gif, or svg | 200 kB |
25 MB |
Updated 2 months ago
